Improve your Twitter links using Cards
Twitter is a great way to promote blog articles to your followers. This article explains how to make your tweets look more appealing using an image and description metadata. Cards are not new to Twitter, however it took me a while to find the right links, and to get it up and running.
Twitter Cards improve the layout of your URL link, by including title, description and optionally an image. The two types of cards I have used are Summary Card and Summary Card with Large Image

To use Twitter cards for your article, you need to include <meta> tags to the HTML.
The following (from the Twitter dev article), is an example of adding meta for a Summary Card with Large Image.
    <meta name="twitter:card" content="summary_large_image">
    <meta name="twitter:site" content="@RussLescai">
    <meta name="twitter:creator" content="@RussLescai">
    <meta name="twitter:title" content="Blog article about Elephants">
    <meta name="twitter:description" content="Elephants are the largest animals with trunks.">
    <meta name="twitter:image" content="https://mysite/svn/trunk/elephant.jpg">
The above tags need to be inside your <head> tag for Twitter to read. Note, the image URL has to be an absolute URL. For example, /svn/trunk/elephant.jpg with not work.
A side note in CloudFlare I noticed three crawlers, which had crawled my site within the last 24 hours. I did some research and they are:
- Google - Google Search crawler
- Twitter - Twitter URL preview and metadata crawler
- applebot - Apple Siri search bot
…Anyway, back to Twitter Cards. Twitter crawls sites to read metadata, which means it can take a while for Twitter to treat your URL differently. From my experience, I found that previous tweets WILL update once they crawl, you don’t need to delete your tweet and recreate it. Also, using the Twitter Card Validator for blog posts made them update shortly after (about 5 minutes for me).
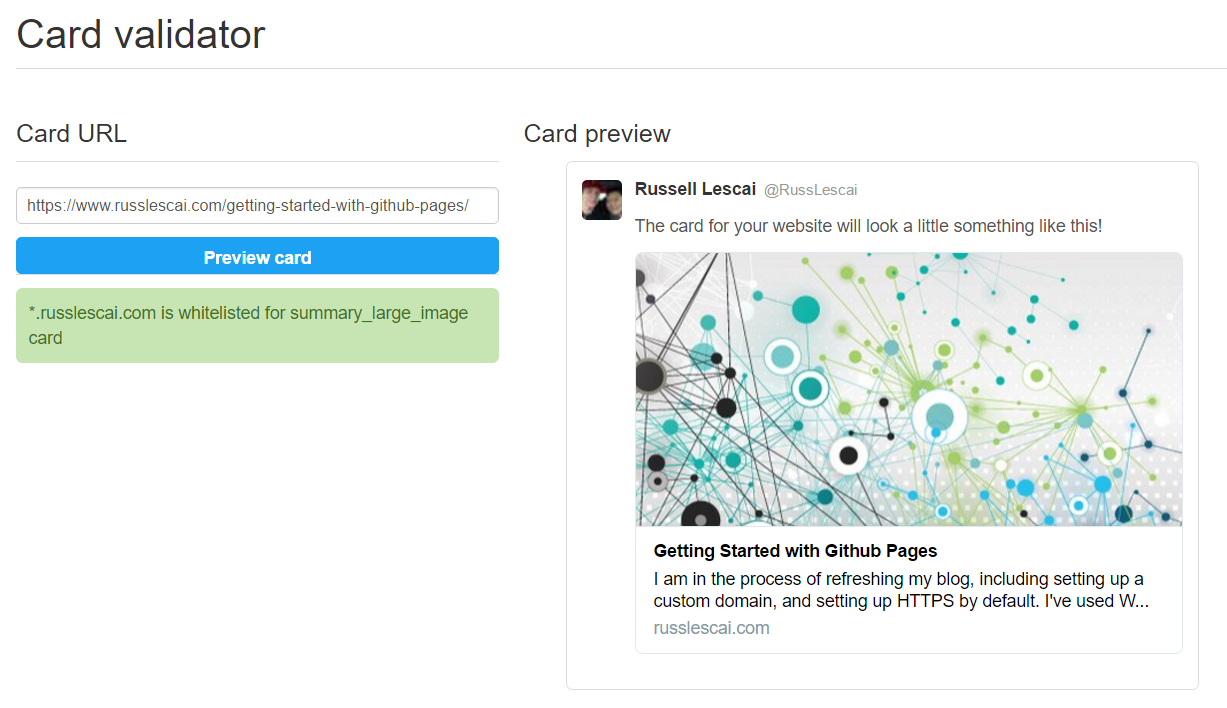
The Twitter card validator is a site which you can use to preview your cards before tweeting, and to confirm your <meta> tags have been setup correctly.
As you may know from my article about setting up this blog, I use Github Pages to host articles as static HTML pages. Github generates static HTML pages from Jekyll templates, Therefore I can make the above meta tags dynamic, by using parameters at the top of each article.
In my meta.html layout page, I include the following:
    <meta name="twitter:card" content="summary_large_image">
    <meta name="twitter:site" content="@RussLescai">
    <meta name="twitter:creator" content="@RussLescai">
    <meta name="twitter:title" content="Improve your Twitter links using Cards">
    <meta name="twitter:description" content="Twitter is a great way to promote blog articles to your followers. This article explains how to make your tweets look more appealing using an image and description metadata.">
    <meta name="twitter:image" content="https://www.russlescai.com/images/blog-banner.jpg">
The title, description and image are automatically rendered when generating the static HTML.
On the top of each of my posts, I now include the following:
---
layout: post
title: Improve your Twitter links using Cards
description: Twitter is a great way to promote blog articles to your followers. This article explains how to make your tweets look more appealing using an image and description metadata.
imgurl: images/blog-improve-your-tweek-links.jpg
---
The fields are automatically populated in the meta tags, which means Twitter will render all posts nicely. Note I use relative URLs for my image inside each post, in the layout template I specify the https://www.russlescai.com parameter to ensure the link is absolute afterwards.
That’s all there is to it! If you have any other tips which could help others, please put them in the comments!